Dashboard
The dashboard is the first page you see when you log in to the application. It is the main page of the application that gives you a quick overview of the application's state. It is also the page that you can use to navigate to other pages of the application.
Small Cards
The top section of the dashboard will give you an overview of the plan you are currently subscribed to. It will highlight how many customers you have along with how many licenses you have used. It will also show you how many licenses you have available to use. Finally, it'll show you how many products you have created within the application. Currently, the small cards are not customizable, but this is something that will be added in the future so more metrics are available for you to see at a glance.
Graphs and Licenses
Below the small cards are two datasets. The first is how many licenses you have used per product. This will show
licenses that are active, expired, suspended, or inactive. All licenses in this dataset are counted towards your
"Licenses in use".
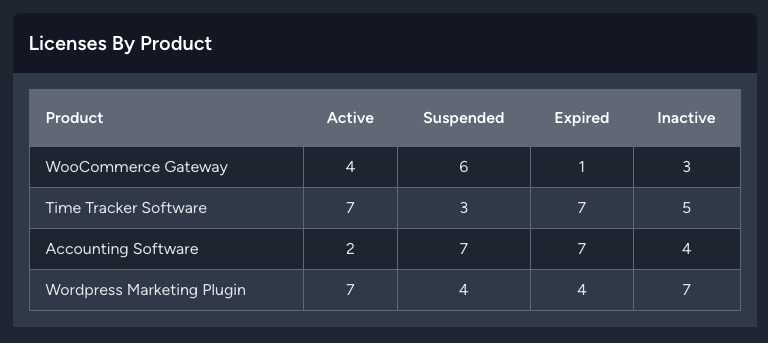
Important Note: Expired licenses are still counted towards your "Licenses in use" because they are still active in the system. They are just not able to be used by customers.
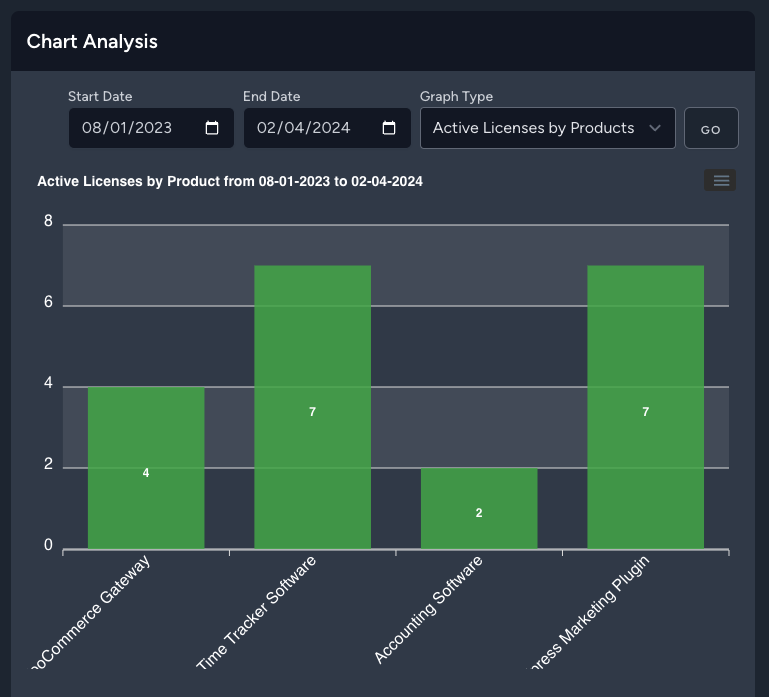
The second dataset on this page defaults to a graph that shows you how many active licenses there are per product. The graph can be changed to one of the following options;
- Active Licenses By Product
- Licenses Overall
- Customers by Product
- New Customers by Month
Each of these charts will require a date range provided by you. The default date range is the last 6 months prior to
the date you are viewing the dashboard. You can change the date range by clicking on the date range picker and
selecting a new date range. The date range picker will allow you to select a date range from the today to
however far in the past you would like. Please note, however, the larger the time frame, the longer it may take to
load the data on the charts. so please be patient if you select a large date range.
Charts can be downloaded, printed, or saved as an image by clicking on the three dots in the top right corner of the
chart. You can also download as a Excel or CSV file by clicking on the download button in the top right corner of
the chart.
More charts will be added in the future to give you a better overview of your data. Should you have a particular
request, please feel free to contact us and we will see what we can do to accommodate your request. We plan to reply
within 24 business hours of the moment you send your email.
Products
The products section is the heart of what makes everything work. Without a product, you can't assign licenses, neither can you assign customers. This section will show you how to create a product, update a product, and delete a product.
Adding a Product
To add a product, click on the "Products" link in the sidebar. This will take you to the products page. On this
page, you will see a card for each of the products you have created. If you have not created any products, you will
see a message that says "No products found"
Click on "Create Product" a modal will appear where you can complete the form and add a product.
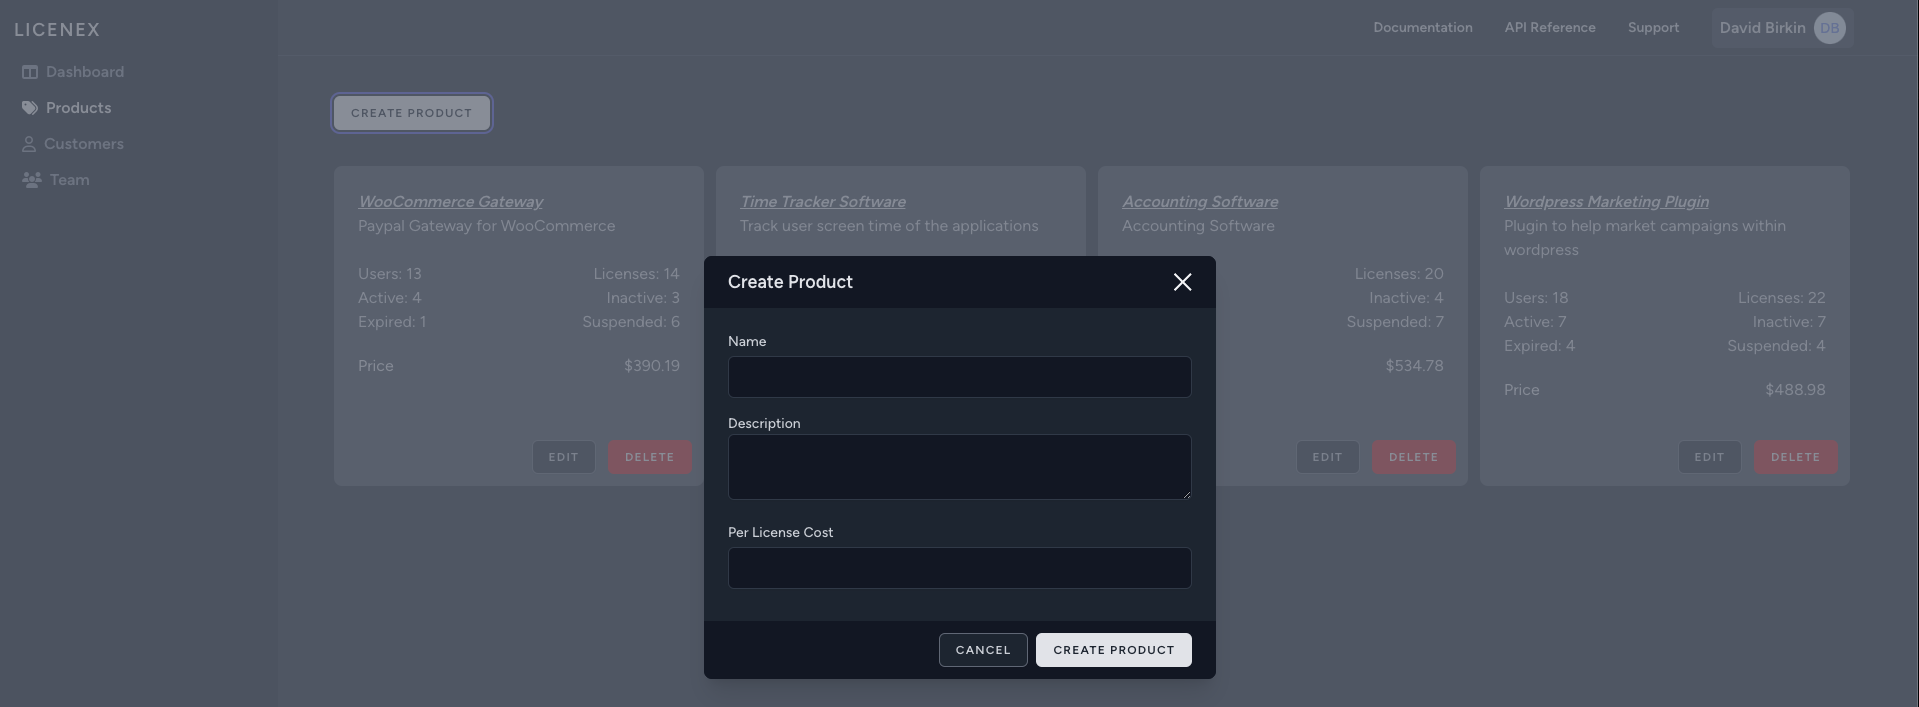
If you would like to track monetary metrics in the app, you can enter the cost of a license (or product fee) her. If you do not want to, you can leave this field blank. You can also add a description of the product here. This is useful if you have multiple products that are similar, and you want to differentiate them. Once you have filled out the form, click "Create Product" and you will be taken back to the products page. You will see a message that says "Product created successfully" and you will see the product you just created in the list of products.
As you gain customers/users for your product, you will be able to see the number of licenses assigned to each. These will be broken into active, inactive, suspended, and expired licenses. You will also be able to see the number of customers/users assigned to each product.
Update a Product
To update a product, click on the "Products" link in the sidebar. This will take you to the products page. On this
page, you will see a card for each of the products you have created. If you have not created any products, you will
see a message that says "No products found"
Click on "Edit" on the product you would like to update. A modal will appear where you can update the product.
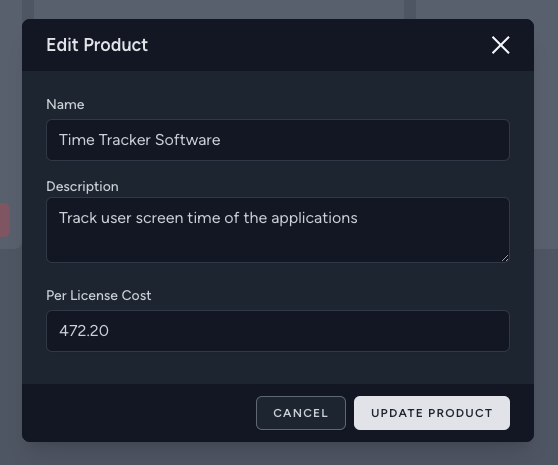
You can update the name, description, and cost of a product. Once you have made your changes, click "Update Product" and you will be taken back to the products page. You will see a message that says "Product updated successfully" and you will see the product you just updated in the list of products.
Delete a Product
To delete a product, click on the "Products" link in the sidebar. This will take you to the products page. On this
page, you will see a card for each of the products you have created. Click on "Delete" on the product you would like
to delete. A modal will appear where you can confirm the deletion.
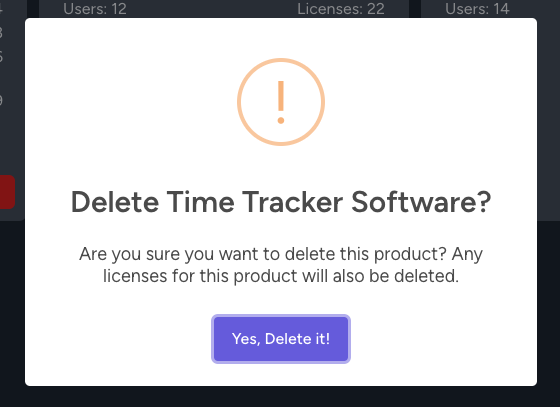
EXTREMELY IMPORTANT: DELETING A PRODUCT WILL SET ALL LICENSES FOR SAID PRODUCT IMMEDIATELY TO EXPIRED. PLEASE MAKE SURE THIS IS WHAT YOU WANT TO DO BEFORE DELETING A PRODUCT. THIS ACTION CANNOT BE UNDONE AND IS PERMANENT. ANY ACTIVE CUSTOMERS WILL LOSE ACCESS TO THEIR PRODUCT.
Once you have confirmed the deletion, you will be taken back to the products page. You will see a message that says "Product deleted successfully" and you will no longer see the product you just deleted in the list of products.
Customers
Now the next stage of the process after adding a product is adding a customer. This section will show you how to add a customer, update, search and delete a customer.
Adding a Customer
To add a customer, click on the "Customers" link in the sidebar. This will take you to the customers page. On this page, you will see a table with all the customers you have created. If you have not created any customers, you will see a message that says "No customers found". For customers that show, you will see basic information about the customer, including their name, email, phone number, and the number of licenses they have.
Viewing a Customer
To see more information about a customer, click on "View" on the customer you would like to see. You will be
directed to a customer profile page. This page allows you to easily create a new license for the customer, as well
as see all the licenses they have. Licenses are displayed as cards, similar to that of prooducts. The age of the
license will also be displayed. Any licenses that are not activated will show "Not Activated". This is a way to see
if a customer has activated their license or not. If a customer has activated their license, you will see the age of
the license.
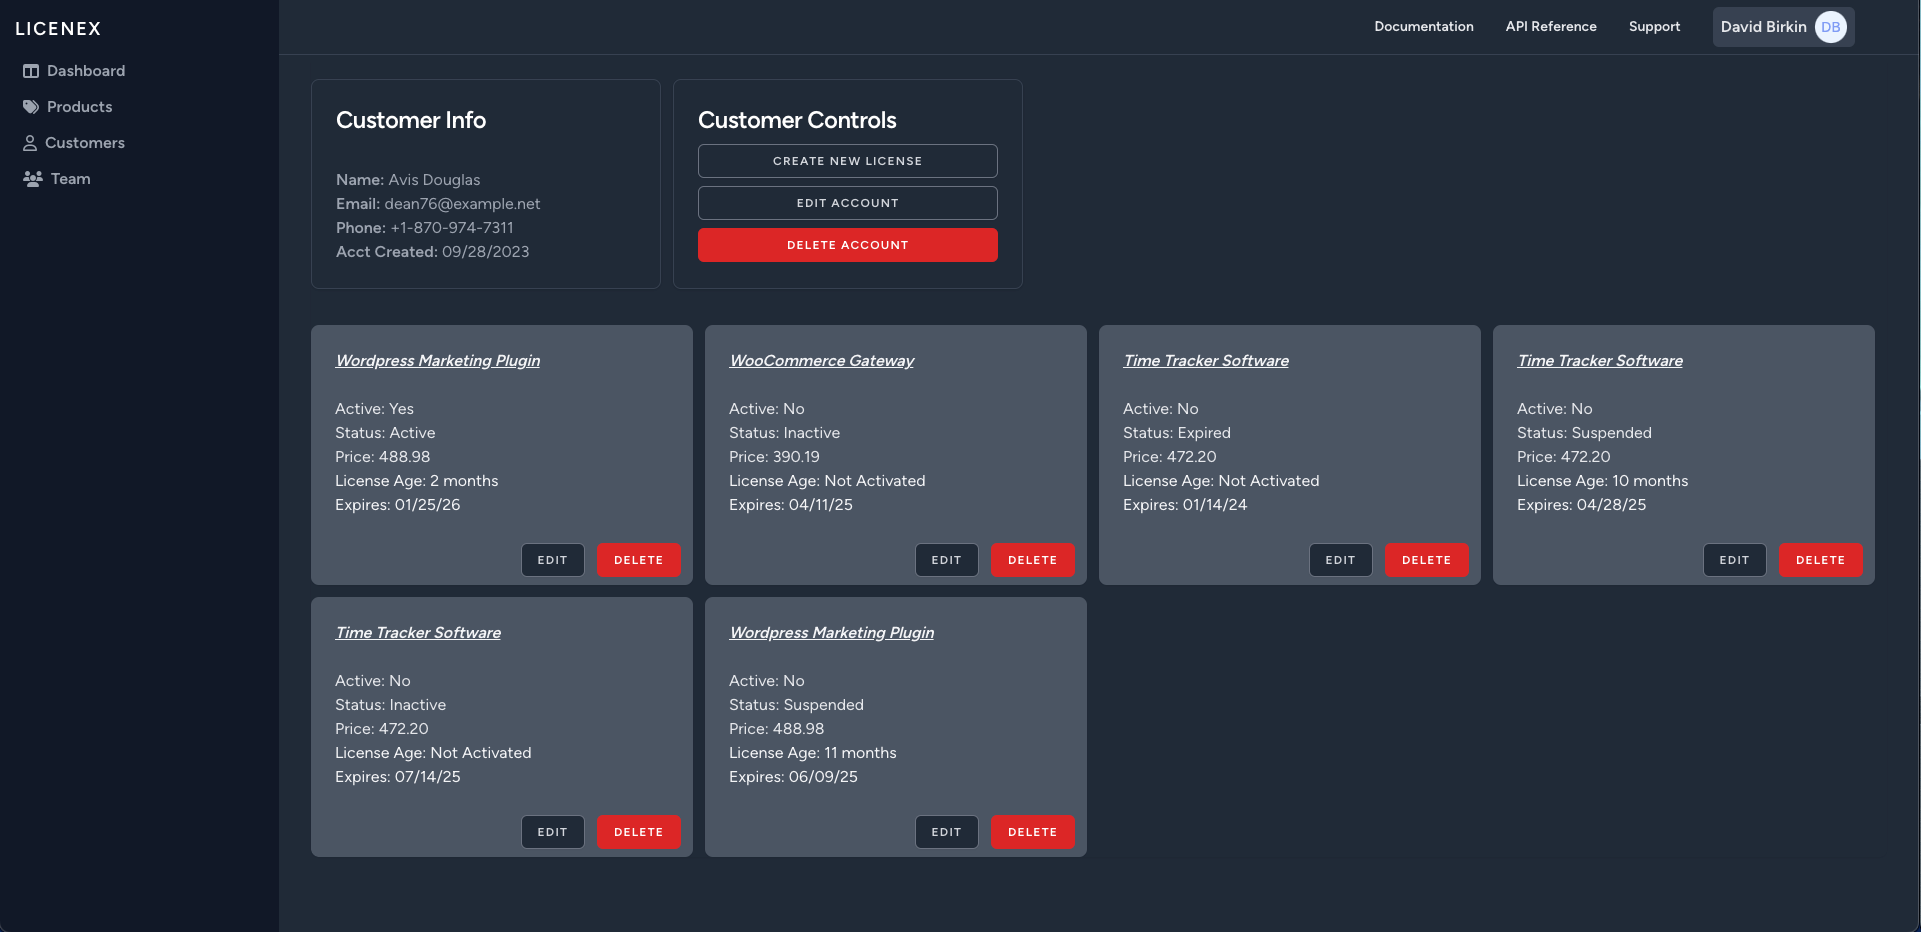
From these cards, you will be able to edit the license, which allows you to extend, suspend, or update other license details.
Search Customer
As your customer base grows, you will want to be able to search for customers. On the top right corner of the "Customers" are 2 form fields. The first one is a dropdown where you can choose what you would like to search by. The current options are "First Name", "Last Name", "Email", and "Phone Number". The second field is a text field where you can enter your search query. Once you have selected your search criteria and entered your search query, as long as you have entered 3 or more characters, the search will be performed automatically. You can keep changing your search query until you get the results you want.
Update a Customer
To update a customer, please make sure you are viewing the customer you would like to update. This is where you
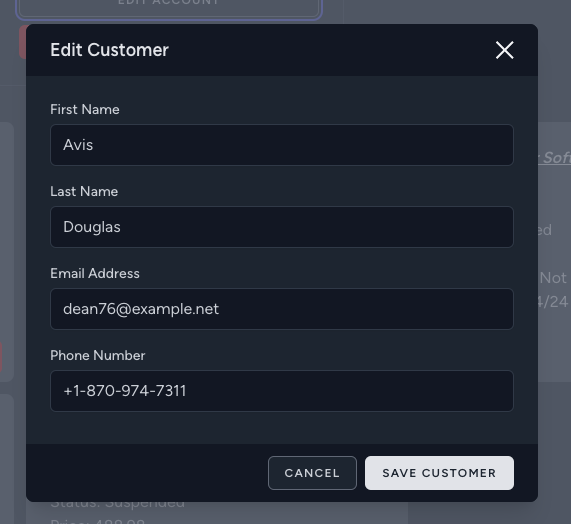
click "view" on the customeer table. Once you are viewing the customer, click on "Edit Account" in the "Customer
Controls" section of the page. This will display a modal with basic information on, including their name, email and
phone number. You can update any of these fields. Once you have made your changes, click "Save Customer" and you
will be taken back to the customer profile page. You will see a message that says "Customer updated successfully".
Delete a Customer
To delete a customer, click on the "Customer" link in the sidebar. This will take you to the customers page. On this
page you are presented with a table that lists all the customers. There are 2 ways to delete a customer. The first
is to click on delete next to a customers in the table and the second way and probably the preferred way is to view
the customers profile so you can clarify you are deleting the correct customer. To view a customers profile, click
"View"
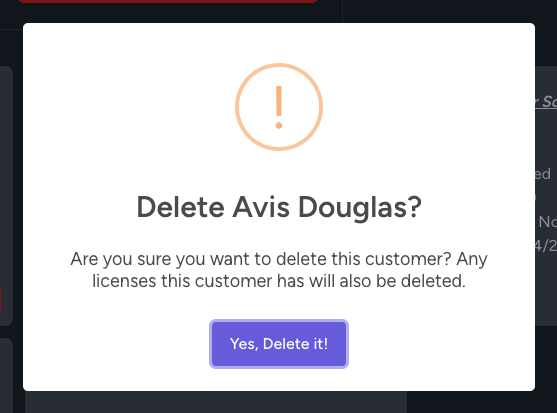
EXTREMELY IMPORTANT: DELETING A CUSTOMER WILL DELETE ALL LICENSES ASSOCIATED WITH THE CUSTOMER. THIS ACTION IS PERMANENT AND WILL PREVENT A CUSTOMER FROM USING THERE APPLICATIONS.
Once you have confirmed the deletion, you will be taken back to the customer table where you will see a message that says "Customer Account Deleted Successfully" and you will no longer see the customer you just deleted in the table of customers.
Roles
Before talking about the Team section of the application, now is appropriate to go over Roles & Permissions. For the moment the application has 3 roles for simplicity. These are; Super Admin, Admin and User. Each of these roles have a set of predetermined permissions associated with them. These are what we recommend out of the box, however, we understand all businesses have different business requirements. For this reason, you can tailor permission sets for a member of your team when creating them, or editing them.
Permissions Breakdown
Admin and Super Admin currently have the same permissions out of the box to see and do everything the application allows. Users, however, only have a subset of permissions enabled out of the box. A breakdown of the permissions are outlined in the table below
| Super Admin, Admin | User | |
|---|---|---|
| Create Customer | ||
| Update Customer | ||
| View Customer | ||
| Delete Customer | ||
| Add Customer Note | ||
| Create License | ||
| Update License | ||
| Extend License | ||
| Activate License | ||
| Deactivate License | ||
| View License | ||
| Create API Key | ||
| Delete API Key | ||
| Create Product | ||
| View Product | ||
| Update Product | ||
| Delete Product | ||
| Invite New User | ||
| Update User | ||
| View User | ||
| Delete User | ||
| Modify User Permissions | ||
| Send Password Resets |
A reminder that you can adjust all of these permissions on a user by user basis. In addition, these permissions will match the API Key you use to integrate into the application. You will want to make sure your account being used for the API has the necessary permissions to do what you need.
Teams
In this part of the application you will be able to manage your team. Being able to manage what your team members can and cannot do, is an important part of making sure of the smooth running of any business. Please see the breakdowns below to see how we make managing your team simple! To do all the below, please ensure you are viewing the “Team” page.
Adding Member
To add a new team member you will need to click on the “Invite Team Member” button above the table of your team.
This will present a modal where you can enter the information for the new member, select their role and customize
their permissions beyond the default if you so wish. The defaults will be selected when you select the role.
As the modal mentioned, but will mention again here, the password that is set for the user account is completely
random and secure. The new member will have 24 hours to accept the invite through email otherwise they may have to
follow the forgot password procedure.
Updating Member
To do this you are going to want to click on the edit button. The same modal that appeared to add a new team member will appear with all the members details and permissions selected. Here you can make any edits you wish to permissions or changing the users name in the event they change their name, get married etc.
Resetting Passwords
Whilst in most cases a simple “forgot password” should suffice on the login screen, here you can also reset the password yourself by simply hitting “Reset Password”. This will work similarly to the creation process where a random password is set and the team member will need to reset from the email received.
Deleting Member
This is an irreversible action, and we want to ensure that when you do this you know this. Should you want to add the same team member again in the future, you will need to go through the creation process again. Again, this action is IRREVERSIBLE.
